Getting started with NPU workloads
Written by Tamás Deme on Sat Mar 29 2025.
Hi there! Yes, you! With the brand new laptop, woah - a Qualcomm Snapdragon X Elite... with an NPU, even?! Amazing. We were waiting for some like you - where it says "developer" on the name tag... anyway please come to the Window marked as 11, our assistant will be right there with you.
Fun introductions aside: if you'd like to play with the latest and greatest bits of the WinAppSDK and make cool things happen using various locally running machine learning models (on machines with an NPU, that is), follow this guide to get started!
Setting up your environment #
As said bits are still fairly new, first you'll have to get some pre-release software running on your machine.
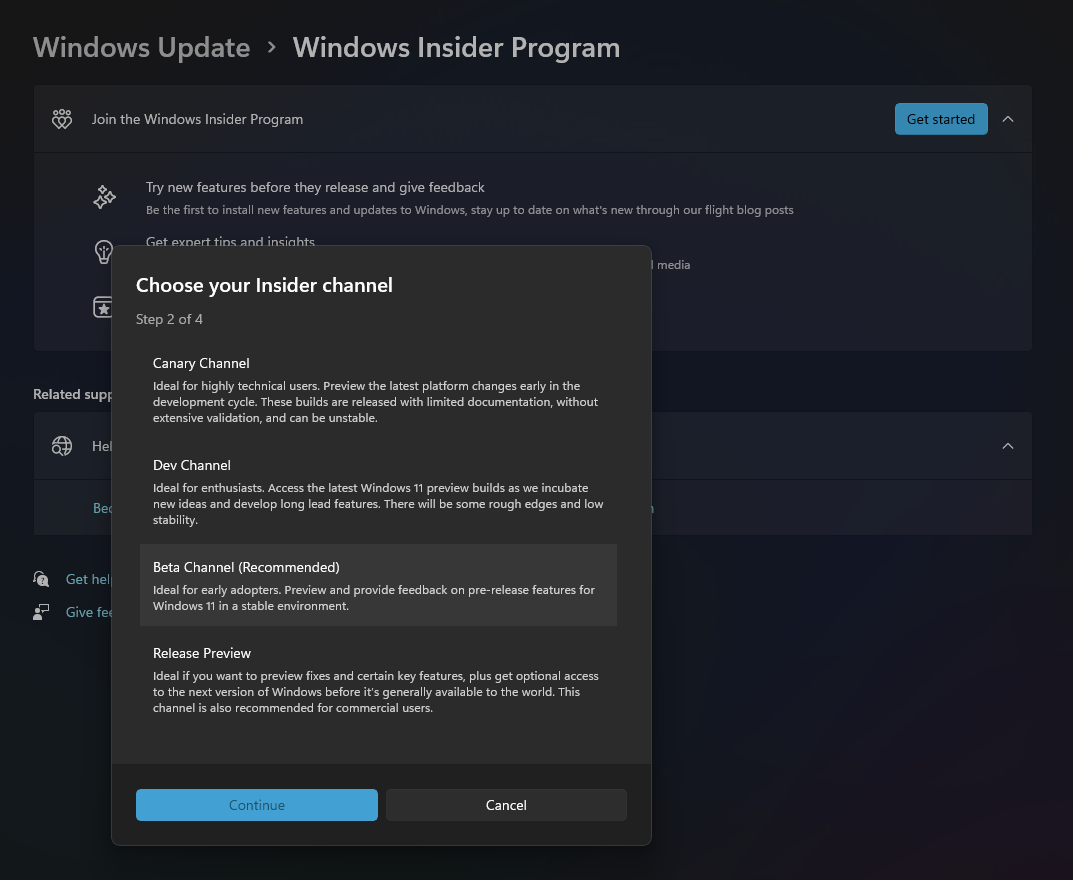
First, you have install Windows 11 build 26120.3073 or later, which - as of writing this - is available on the dev and beta Windows Insider Program release channels. To do this, open the Settings app, head to Windows Update and then follow the steps to enroll yourself in the proper channel. After that succeeds, reboot as requested, go back to the same update screen and search for new updates: you should have the required insider build downloading soon. When that's done, restart and install it.

Second, you have to get Visual Studio 2022 installed, for that follow these steps. Make sure you choose the various Windows app development optional features as you go through the installer.
Third, you have to make sure you have the - currently experimental - Windows App SDK version 1.7-experimental3 installed in your app. There is a stable version 1.7 out, but as the release notes state the Windows Copilot Runtime APIs we'd like to play with are not included. This is a NuGet package we'll replace, so the actual steps to do this will follow in the next "chapter". The SDK is also available for download separately for unpackaged apps and more.
Creating your project #
After getting everything installed, open Visual Studio 2022 and create a new project. In the project dialog search for WinUI 3, and create a new blank app. As the 0th step, make sure to change the target platform to ARM64 from the default x64 up top.
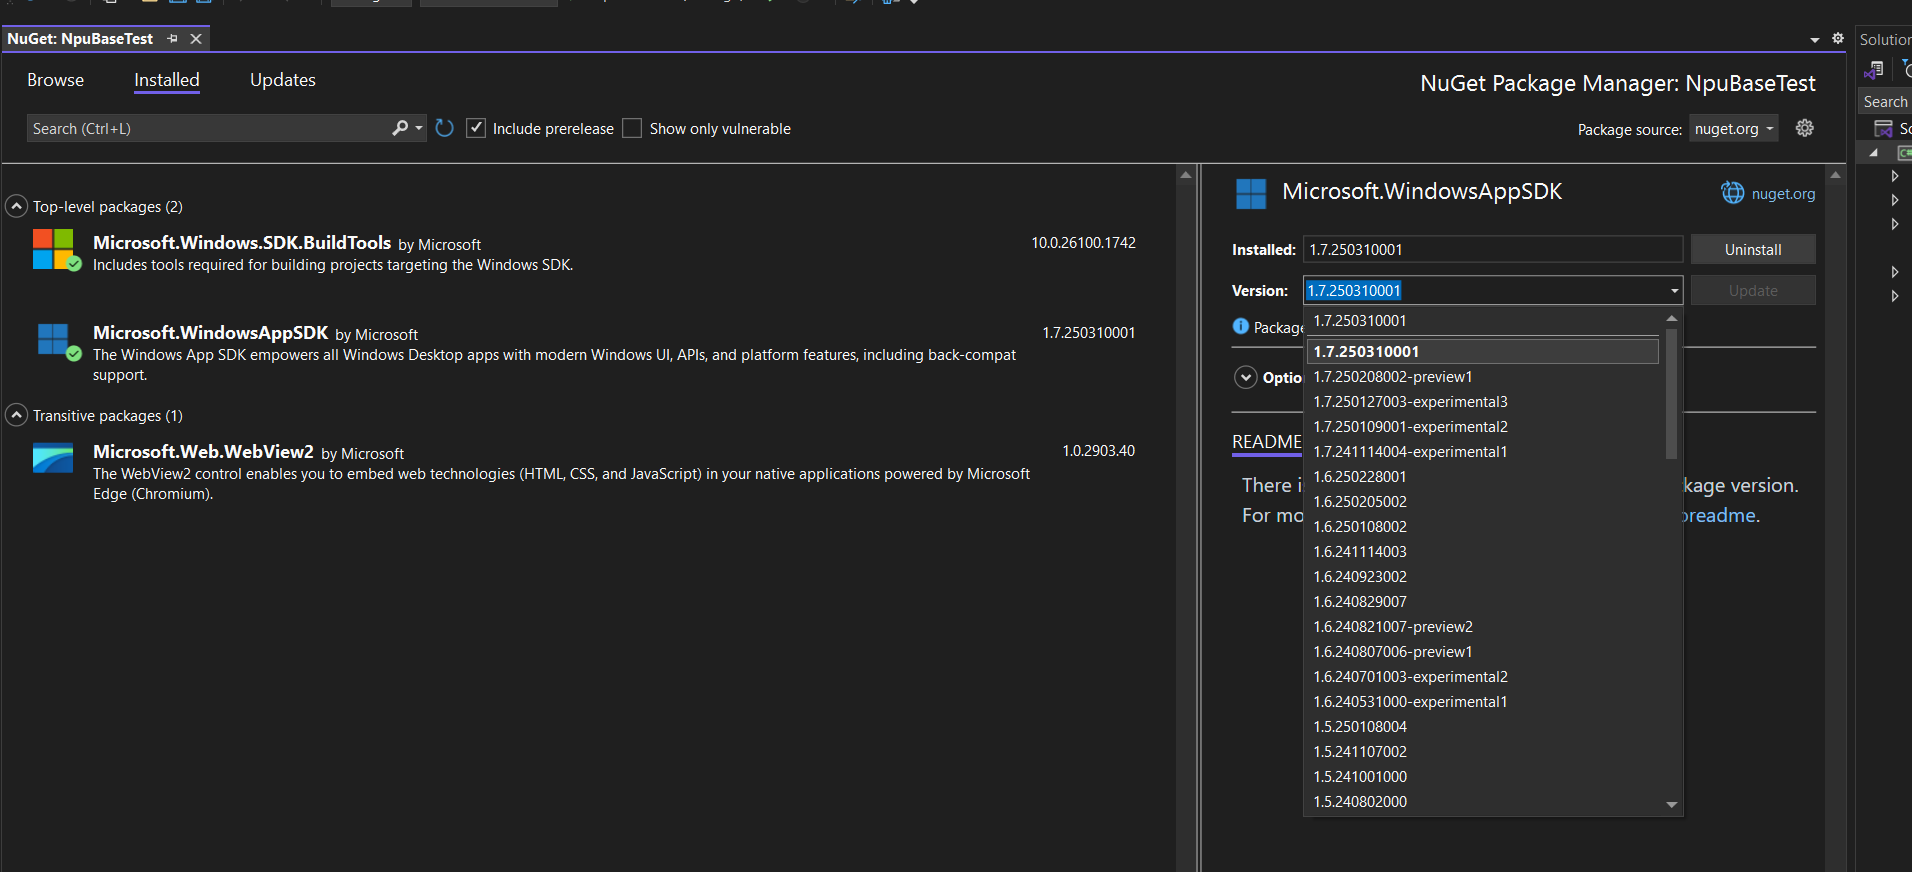
First as mentioned, we need to update the existing NuGet package to the 1.7-experimental3. Right click on Project Dependencies, choose "Manage NuGet Packages" and finally select the "Microsoft.WindowsAppSDK" package.

Make sure to enable the "Include prerelease" checkbox at the top, at which point the "Version" dropdown should update and now show the desired "experimental3" package version available. Select this, and click Update!

Second, right click the project itself and select Properties. In the Application tab, we need to make sure we're targeting the OS version we need for all this to work - in practice that means that we should select 10.0.22621.0 for both "Target" and "Supported" OS version. Now in theory everything is ready for us to make our first NPU-using app!

A quick little sample #
By default, the blank app project has a single button on an otherwise empty window - we'll just add a simple prompt response to this as an illustration. Opening MainWindow.xaml.cs - the "codebehind" file for our window - let's add a few more lines. First add
using Microsoft.Windows.AI.Generative;to the top, as this is the namespace where our desired APIs live. Then, replace the already existing button click handler with the following - read the comments to see what's happening:
private async void myButton_Click(object sender, RoutedEventArgs e)
{
	// disable the button and change the text to say "loading"
    myButton.IsEnabled = false;
    myButton.Content = "Loading...";
    await TryNpu();
}

private async Task TryNpu()
{
	// check if we have the required language model available
    if (!LanguageModel.IsAvailable())
    {
	    // if not, make sure we do
        _ = await LanguageModel.MakeAvailableAsync();
    }

	// create the model
    using var languageModel = await LanguageModel.CreateAsync();
	// set our prompt
    var prompt = "Generate a short pretentious alternative to \"hello world\" that developers often use while programming.";
	// generate and wait for the result
    var result = await languageModel.GenerateResponseAsync(prompt);
	// update and re-enable the button
    myButton.Content = result.Response;
    myButton.IsEnabled = true;
}
After these edits, and hitting F5 we should be presented with our lovely little app containing a single button:

Except when we press that button, we get to wait around a lot...

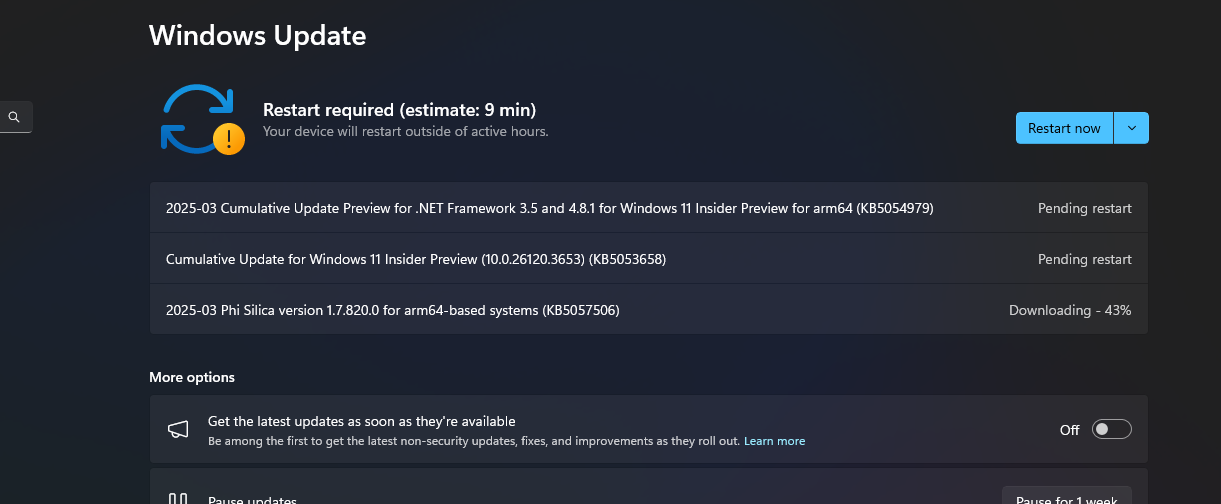
How long? Well - unless you've used the language model before -, long enough to let Windows Update download and install the required language model. Which is... pretty long. Until we add our own feedback - which is a bit beyond the scope of this getting started intro, we can open the Settings app and navigate to Windows Update to observe what's going on:

After waiting around for a bit to let Windows Update finish, our method should finally continue and yield a "fun" result:

Thankfully, the model only has to be downloaded once across the entire system, so subsequent uses should be much much more quicker.
And with that - we've done it! Now you're equipped to create a new project and set it up properly to get started! In the future we should explore a few more useful and complex use cases that you might want to add to your apps.
shore party out